Variously Noted
Remote Debug Oracle Database in a VirtualBox VM using SQL Developer
It’s possible to debug pl/sql code in an Oracle Database, in much the same way as you can in any interactive debugger environment. Jeff Smith shows how it’s done in this blog post.
It get’s a little trickier to setup if your Oracle Database instance happens to be running in a guest VM and you want to debug using a SQL Developer instance running on the host, firstly because in this scenario you can only do ‘Remote Debugging’ as SQL Developer and the Database are not located on the same host, and secondly because setting up VirtualBox networking to ensure SQL Developer and the database can talk to each other takes a little bit of work. Read on to find out how to get it all configured correctly.
The important thing to realise ahead of trying to get this working, is that the protocol flow for debugging is the opposite of what you might expect. In a normal database interaction between SQL Developer and the database, SQL Developer initiates the call, the Database is listening for incoming requests and accepts the connection and initiates the session.
When debugging however, SQL Developer plays the listening role, and it is the database that initiates the session and performs the initial connect to the SQL Developer debugger listener.
The fact that the database is initiating the connection means that two important factors need to be setup correctly:
- The Database Access Control List (ACL) must be configured correctly to permit the the database make the outbound Java Debug Wire Protocol (JDWP) connection.
- VirtualBox must be configured to enable the guest VM (where the database is running) talk to the host machine (where SQL Developer is running).
The ACL must identify the host or hosts that outbound connections may be made to. So before we can figure out what the ACL should be, we need to figure out how to enable the guest VM talk to the host machine.
Configure Host Only Networking
Typically if you are running a guest VM in Virtual Box you’ll default the virtual machine’s network interface to use Network Address Translation (NAT), it’s quick and easy to setup and gives the guest VM access to the Internet. You can use port forwarding to enable the host machine talk to the database running in the guest VM (Jeff has another post showing how to set this up).
But port forwarding only enables the host talk to the guest, it doesn’t enable the guest talk to the host. Fortunately VirtualBox has another networking mode called a ‘Host Only Network’ that does. A Host Only Network is a separate virtual network that consists of the host machine plus any guest VMs running on that host. It doesn’t provide access outside of the virtual network, it just enables the host and guests to talk to each other like as if they had their own private LAN.
A Host Only Network is of limited use in this day and age when we often want guest VMs to be able to auto-update from the internet, or call out to other services on the internet, so what we really need is to reconfigure our guest VM to have two network interfaces, one for the NAT interface, and one for the Host Only interface.
Create Host Only Network
-
In the VirtualBox main window (not the guest VM window), go the Preferences menu option (On OSX its
VirtualBox|Preferences...). -
Click the
Networktab, then theHost-only Networkstab. -
Click the Add button. Now you should have a new network named:
vboxnet0as shown below: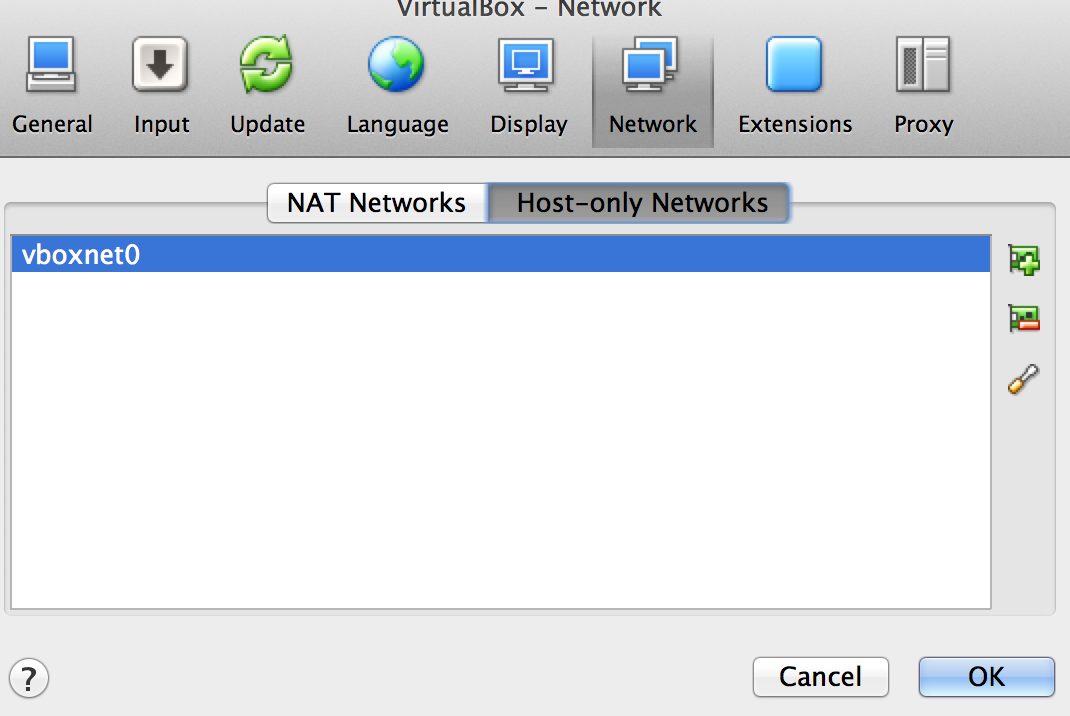
Host Only Network Preference Pane
-
Click the Edit button.
-
Note the IPv4 Address value, it should default to
192.168.56.1. This is the IP address of the host machine on this virtual network -
Click the Cancel or OK buttons.
Now we’ve configured the Host Only Network, next we need to configure the guest VM to use it.
Configure Guest VM
The exact set of steps will vary depending on the operating system used in the guest VM, I’m using the Oracle Developer Day VM, which runs Oracle Linux, so that’s what I’ll show steps for.
-
First, you must shutdown the guest VM. Note shutdown! Not pause, hibernate or suspend the VM, the operating system needs to be totally shutdown. If the OS is not powered off then VirtualBox will gray out the network adapter panels in the VM Network settings preventing the network interfaces being edited.
-
To edit the Network interfaces, select the guest VM in the main Virtual Box window and then click the
Settingsbutton. Click theNetworkbutton, showing a panel like below: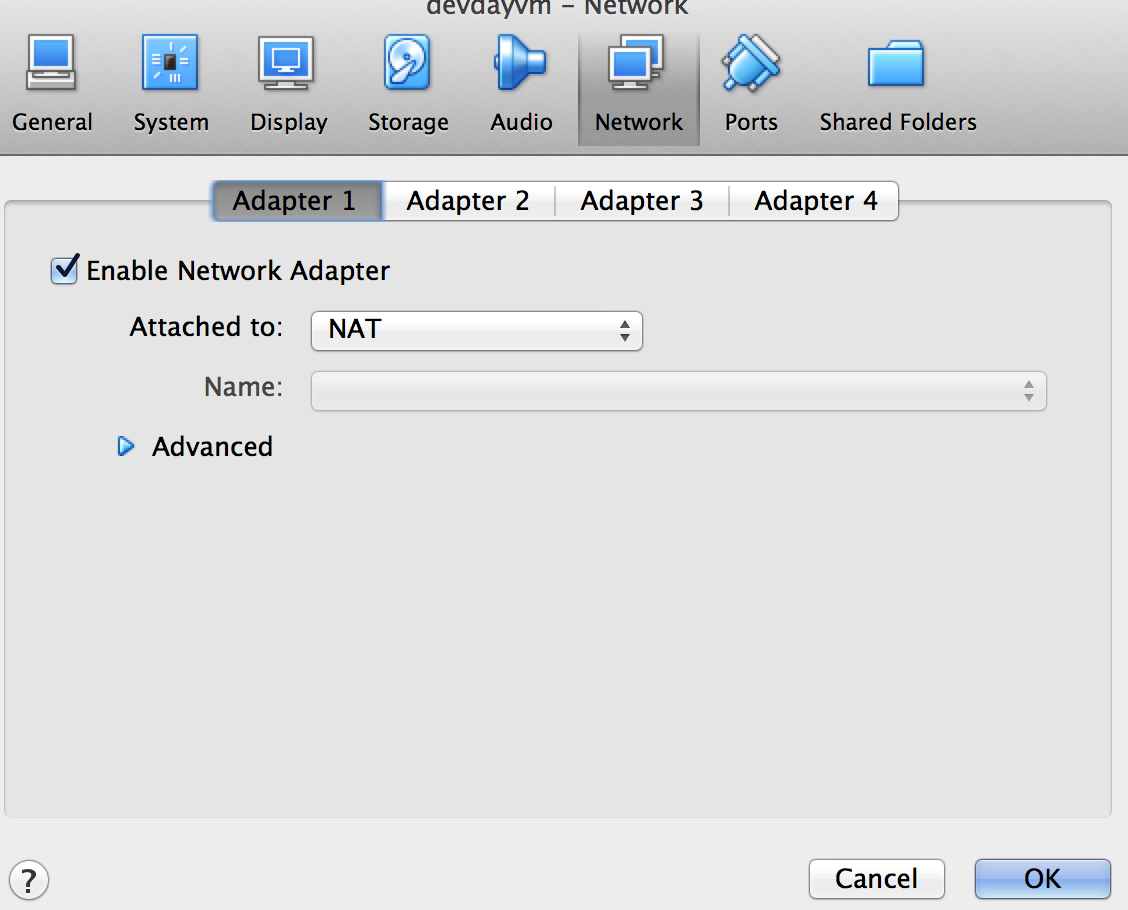
HVM Network Settings
-
Click on the
Adapter 2tab. -
Click
Enable Network Adapter. -
Choose
Host-only Adapterfor theAttached tooption box. -
Choose
vboxnet0for theNameoption box.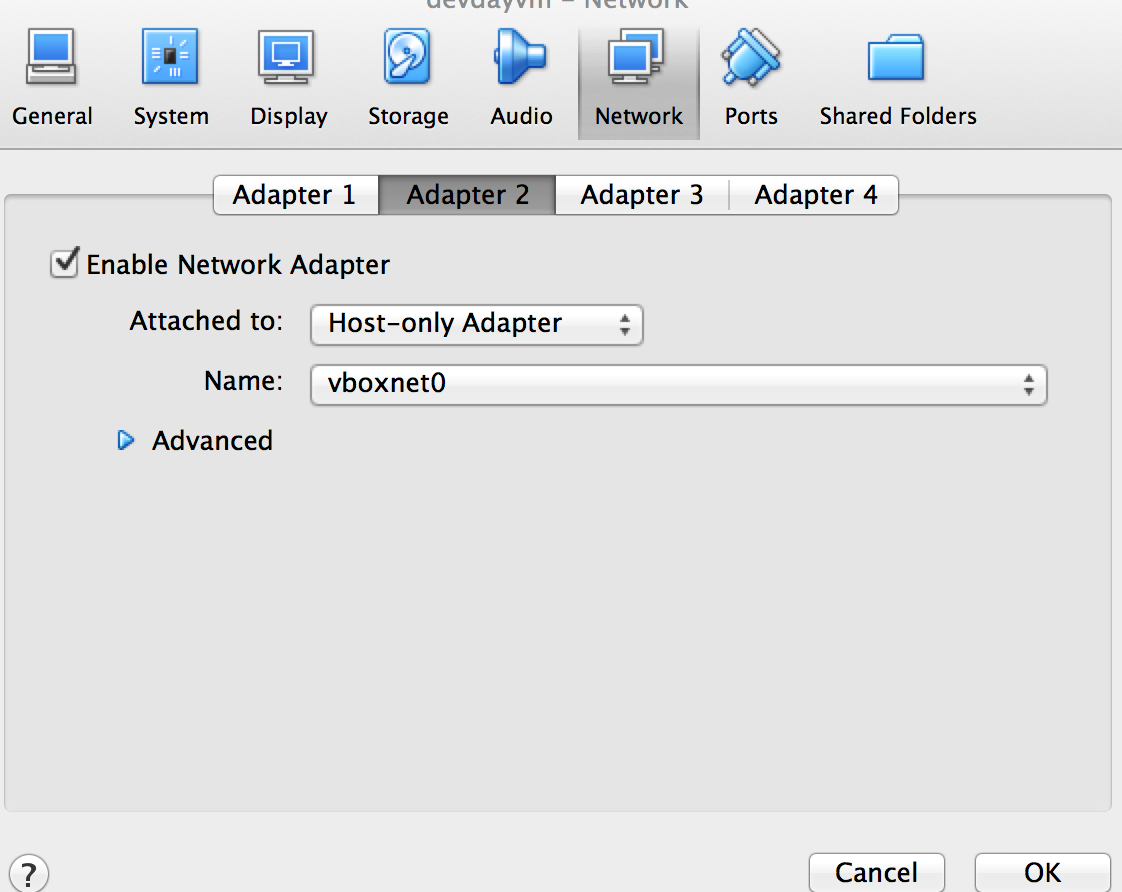
Adapter 2 Host-Only Network
-
Click the
OKbutton. -
Power on the Guest VM.
Confirm Network Configuration
At this point it’s useful to ensure the above changes have taken effect and that the host can talk to the guest, and the guest can talk to the host.
-
In the guest VM check the network settings, for example on the DevDay VM, click the networking icon on the taskbar, the menu should show an additional Ethernet interface.
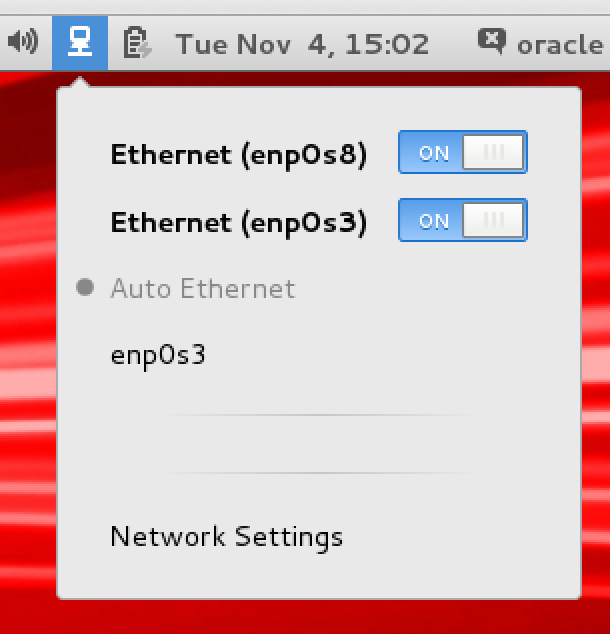
Oracle Linux Network Settings
Click the
Network Settingsmenu option to see the details of the new network connection, it should show that the interface has an IP address of192.168.1.56.101.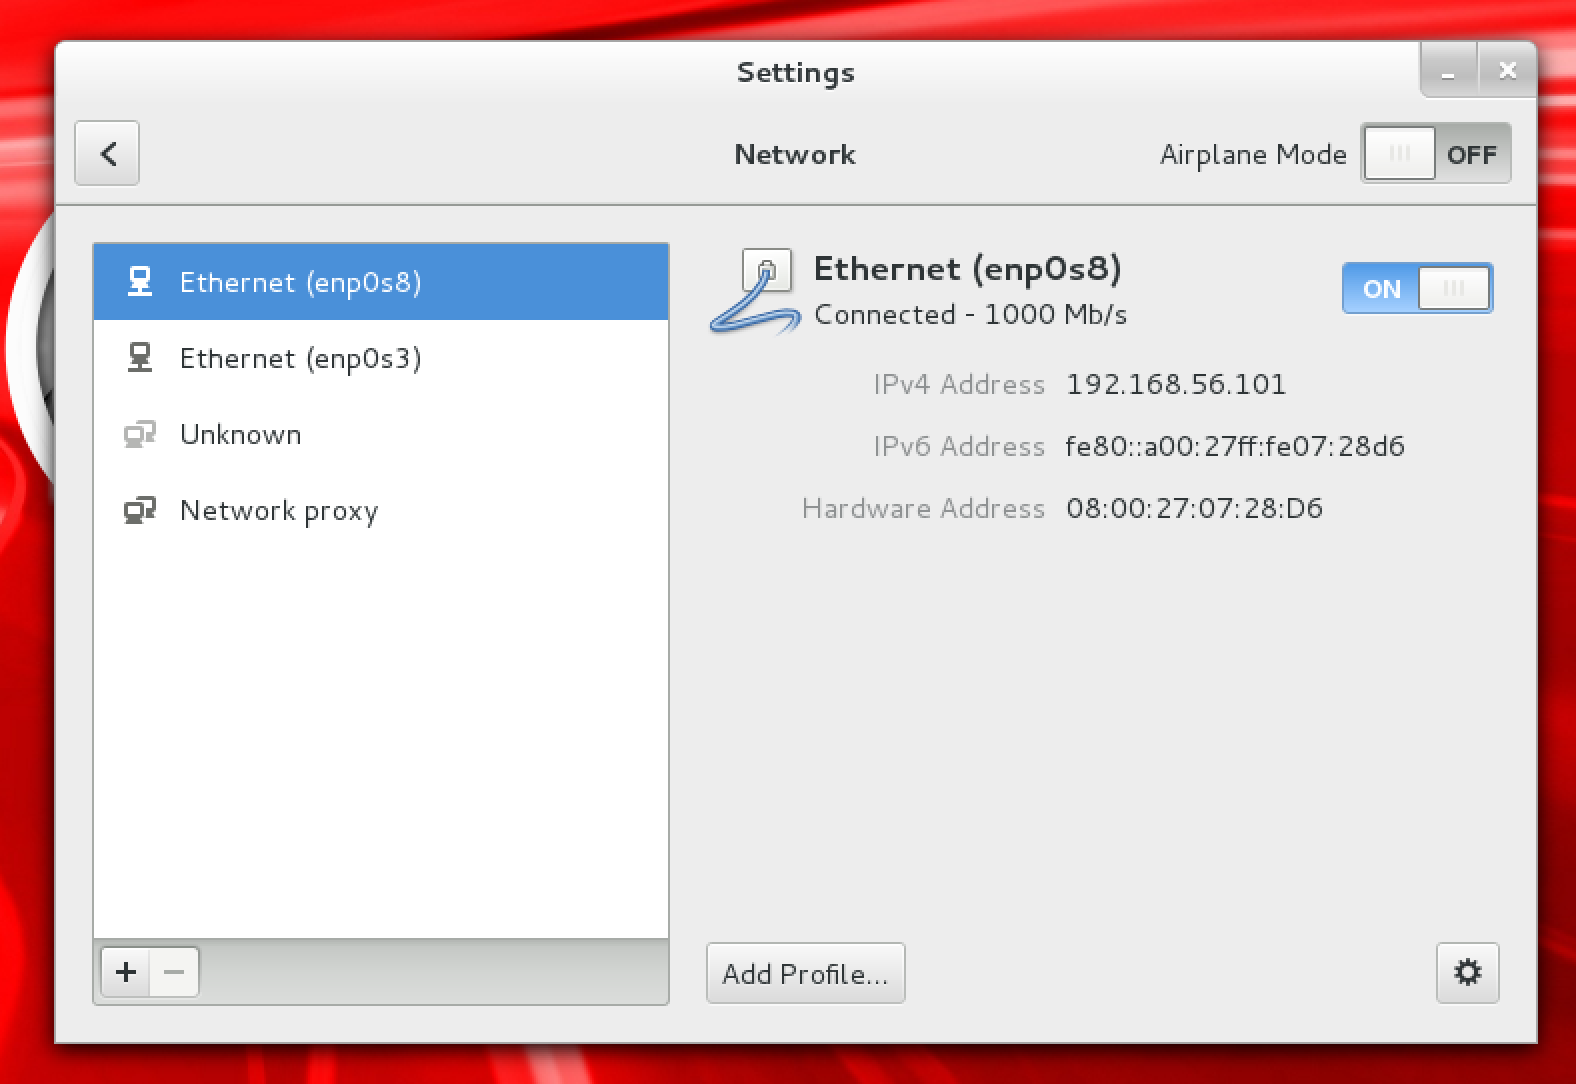
192.168.56.101
-
In the guest open a terminal and type
ping 192.168.56.1, you should see output like the following: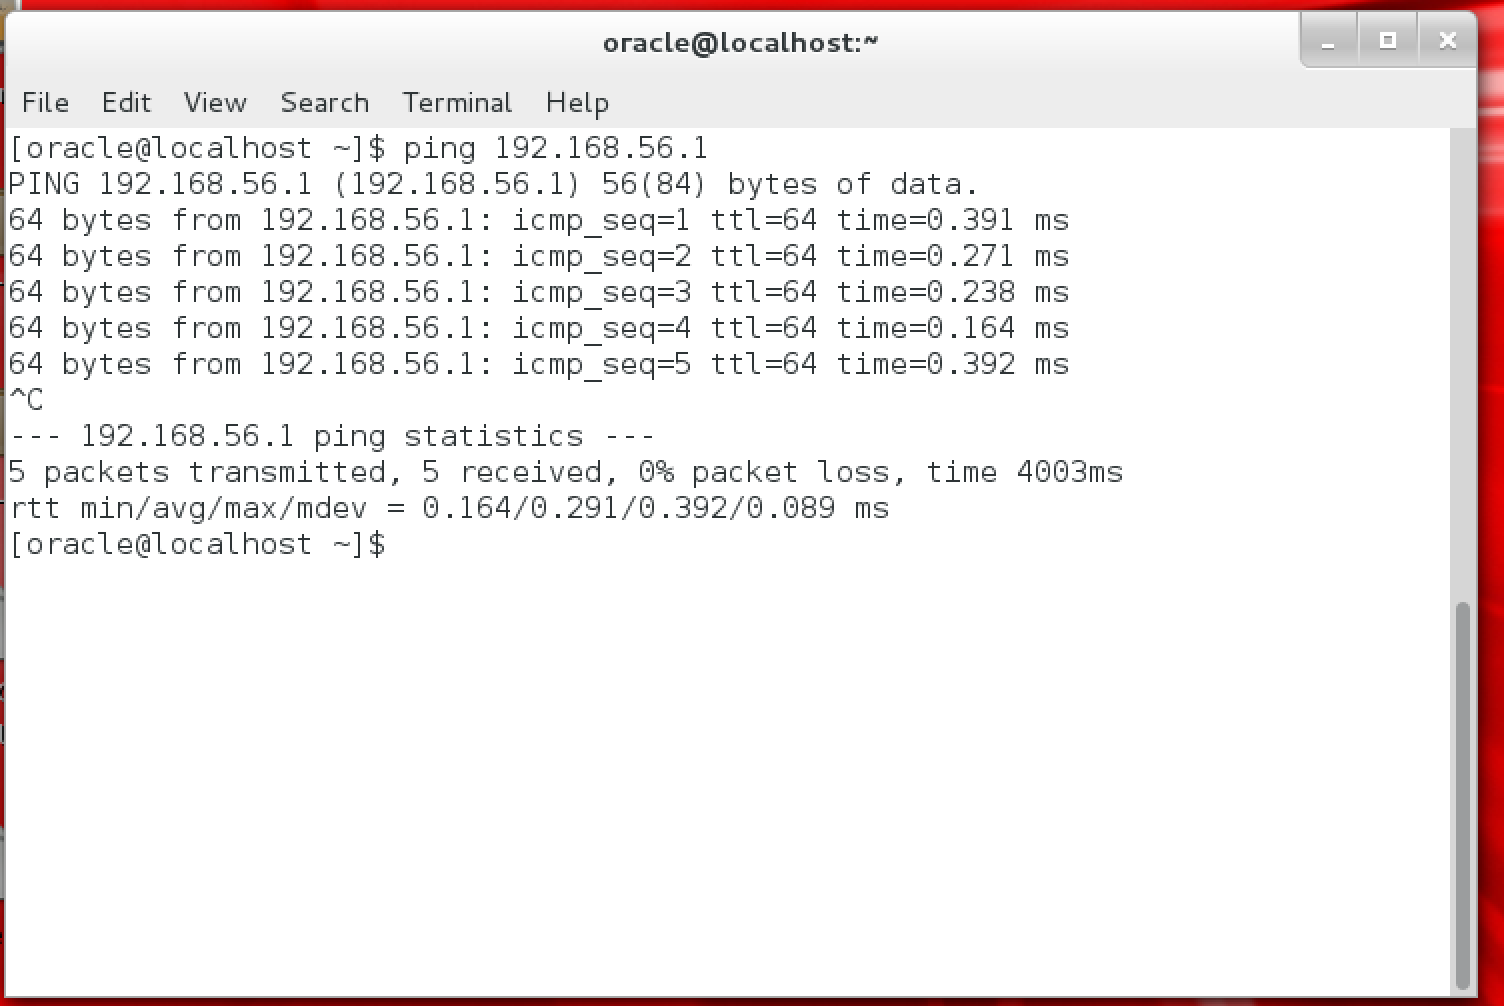
Guest Pinging Host
If the above output is displayed then the guest VM is able to reach the host (over the Host-only network).
-
In the host open a terminal and type
ping 192.168.56.101, you should see output like the following: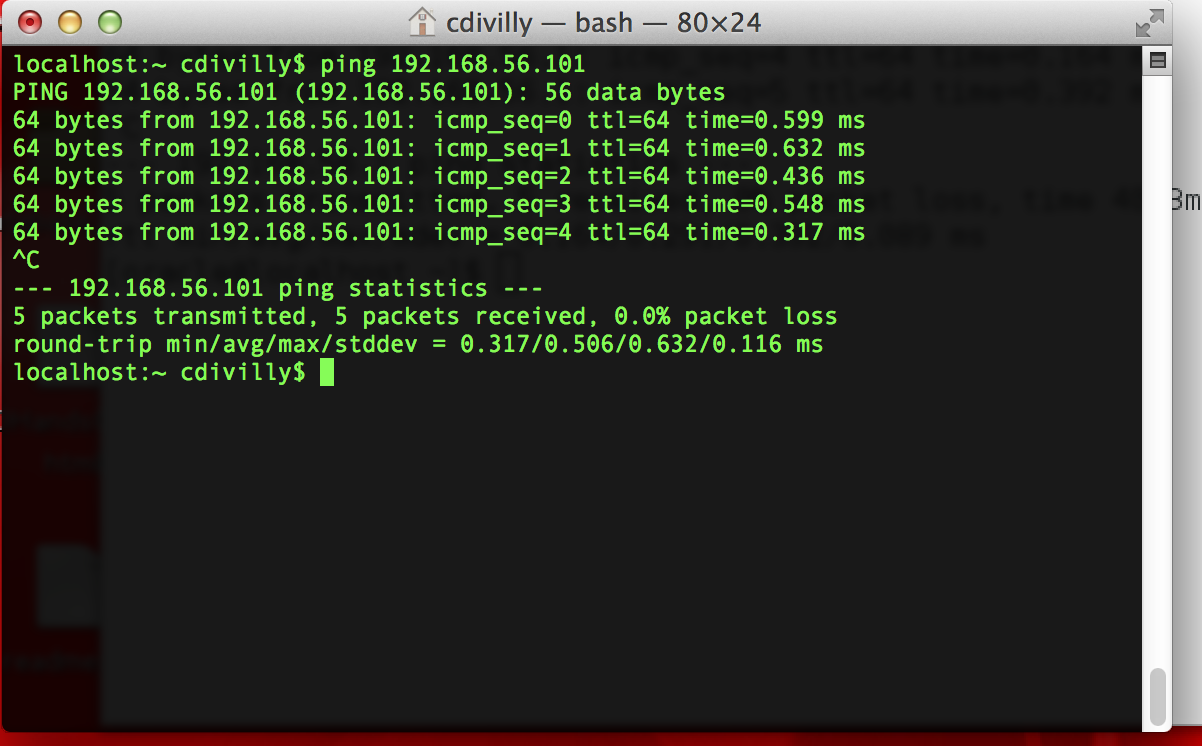
Host Pinging Guest
If the above output is displayed then the host is able to reach the guest VM (also over the Host-only network).
The first time I tried this, my guest could not ping the host, nor could the host ping the guest. I invoked the first rule of debugging, and powered off the guest VM, shutdown VirtualBox, and rebooted my Mac. Once everything was powered back on it all worked fine (Well… What actually happened was I spent several hours going round in circles, trying to figure out what the hell was wrong, and eventually, e-ven-tu-ally, in sheer frustration and desperation, I did the above. Sigh.).
Configure the Database ACL
In Oracle Database 12c and later all outbound connections from the database are disabled by default, the database administrator must selectively enable (whitelist) the outbound connections the database may make. You need to identify the host that is being connected to, the type of connection being made, and the user or roles being granted the privilege of making the connection.
In our case we want to enable the schema that we want to debug (e.g. scott) to make a jdwp connection to our host machine (192.168.56.1) where a SQL Developer instance is waiting to receive the connection. To do this a database administrator user needs to create an ACL permitting this, using code like the following:
|
|
Start a Debugging Session
Firstly launch SQL Developer on the host machine and get it listening for a debug connection:
- In the Connections view, choose the schema to be debugged, right click and select
Remote Debug...from the context menu. - Click
OKin the dialog that appears
Now we need to initiate a debugging session that connects to this listener.
-
Open a SQLPlus session in the guest VM, connecting as user
scott. -
Execute the following command:
1execute DBMS_DEBUG_JDWP.CONNECT_TCP('192.168.56.1',4000); -
You should see output like the following:

Successful Debug Session
If you see the above, then you’ve successfully created a debug session, you can set breakpoints where you wish, and whenever that code is invoked from the SQLPLus session, the session will be suspended and you can step through the code in SQL Developer.